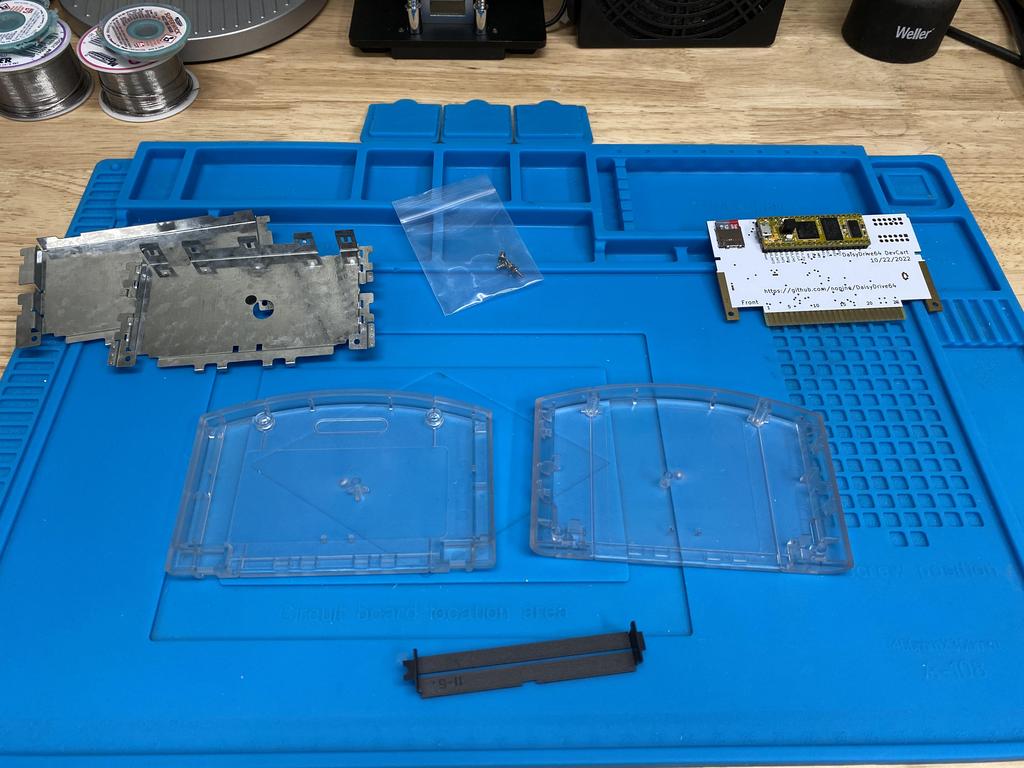
DaisyDrive64
DaisyDrive64 is an N64 cartridge emulator by nopjne (aka Scorp0rX0r on Discord), that uses a Daisy Seed board. It’s similar to the PicoCart64, except that by using a more powerful MCU with more memory, is able to offer a more complete flash cart experience, including support for loading all official N64 games from SD card, as well as saving savestates. In this blog post, I’ll go over how I built this very cool project.
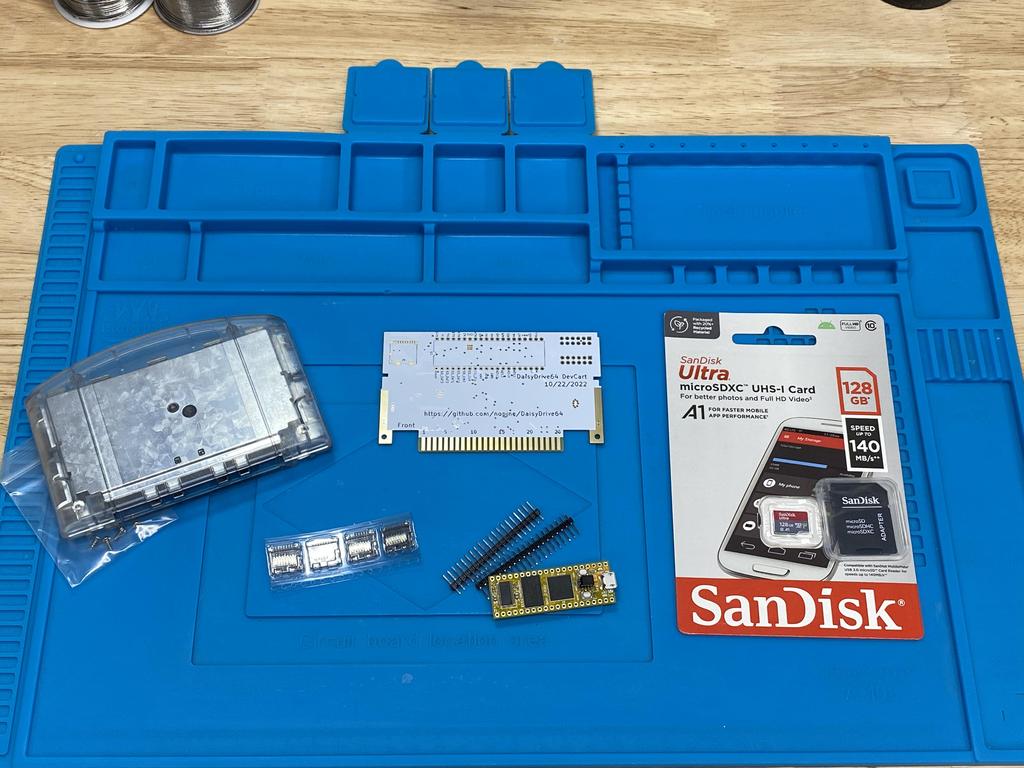
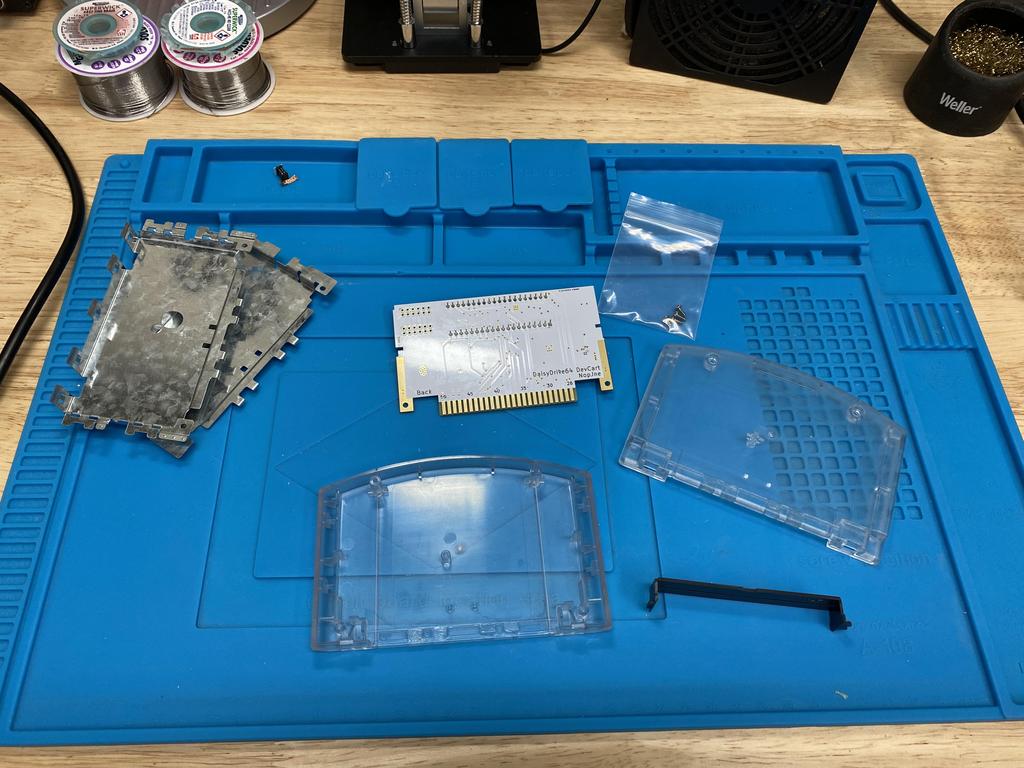
Parts #
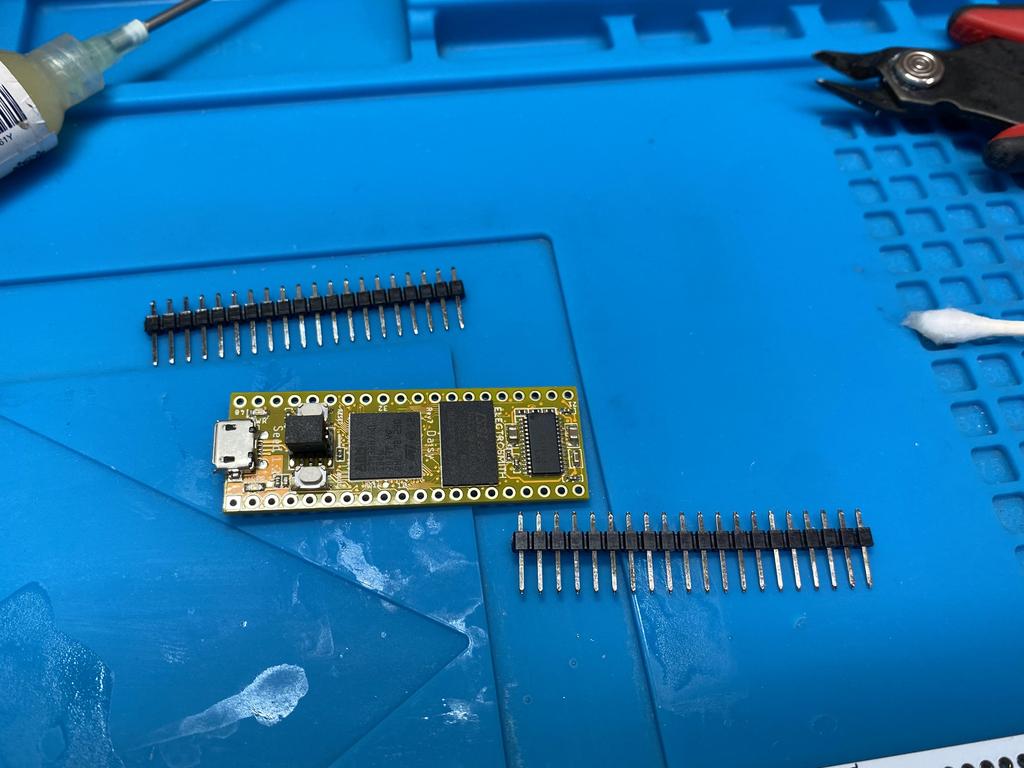
- DaisyDrive64 PCB - $10 (see below for how to get one)
- Daisy Seed (65MB, comes with headers) - ~$25 + shipping from Electrosmith
- SD card slot - $2.42 + shipping from Mouser
- SD card (128 GB is good) - $7.50 from Amazon
- N64 cartridge shell - $5 from AliExpress
At the time of this writing, the only way to get the PCB is to join the Dubious Technology Discord server, and ask Scorp0rX0r for one.
All told, this cost me around $70 USD, when taking shipping to Canada into account. For US residents, this would probably be closer to $60 USD.
The Build #
Soldering parts to the PCB #
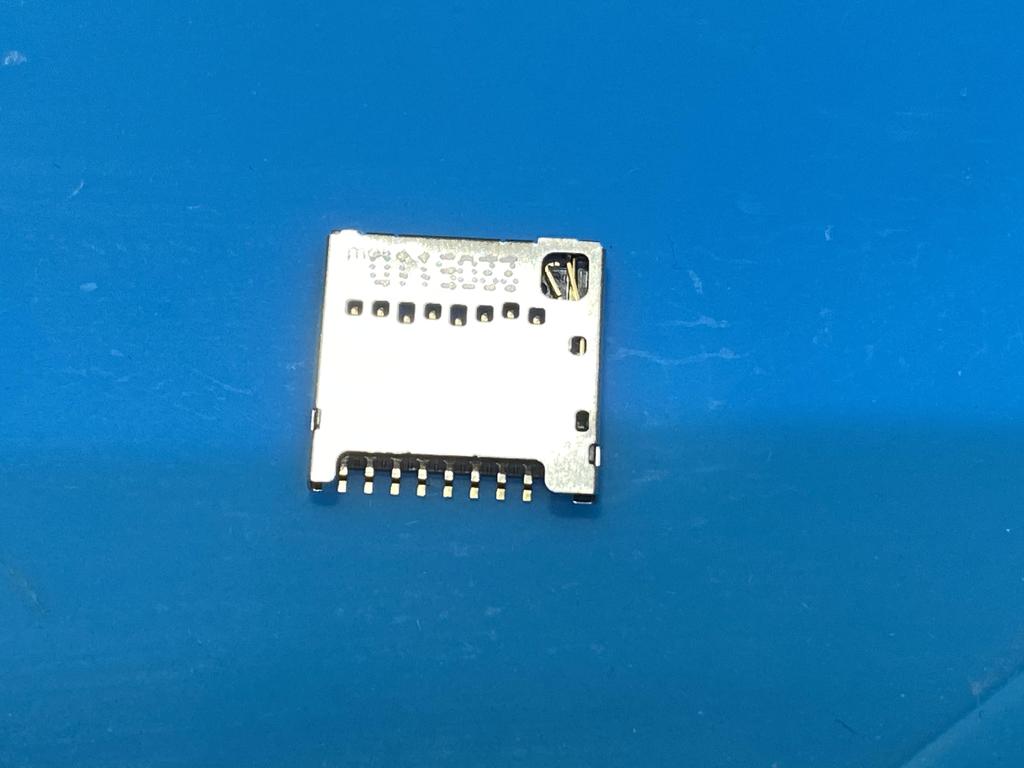
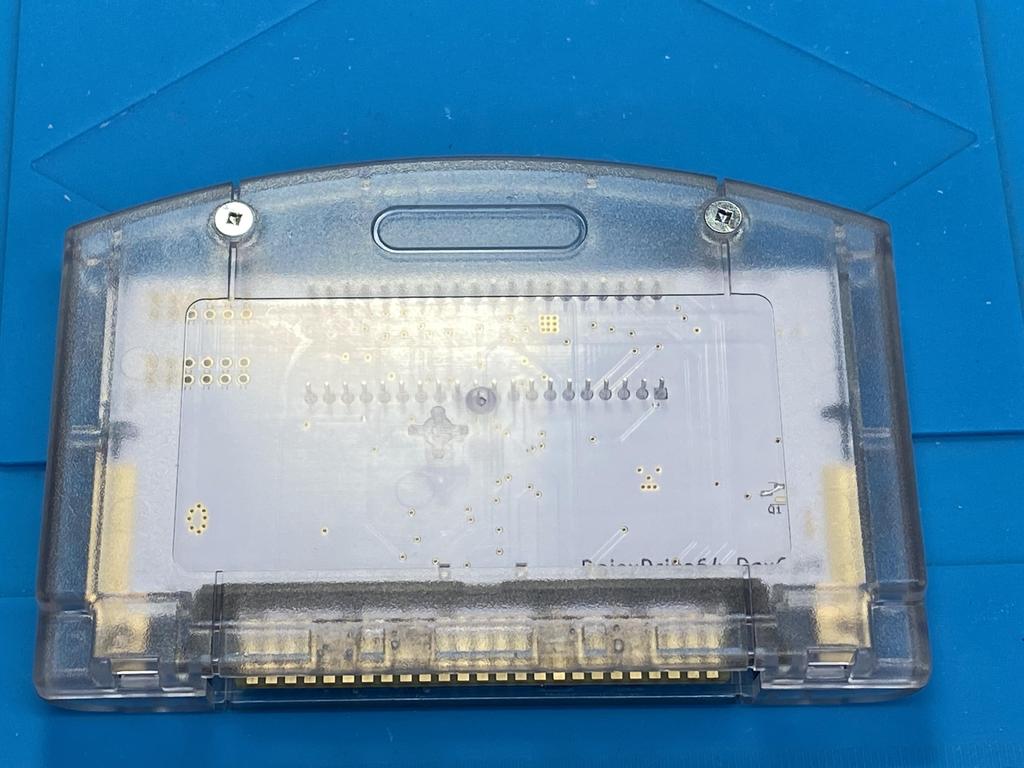
First, I soldered the SD card slot to the board:
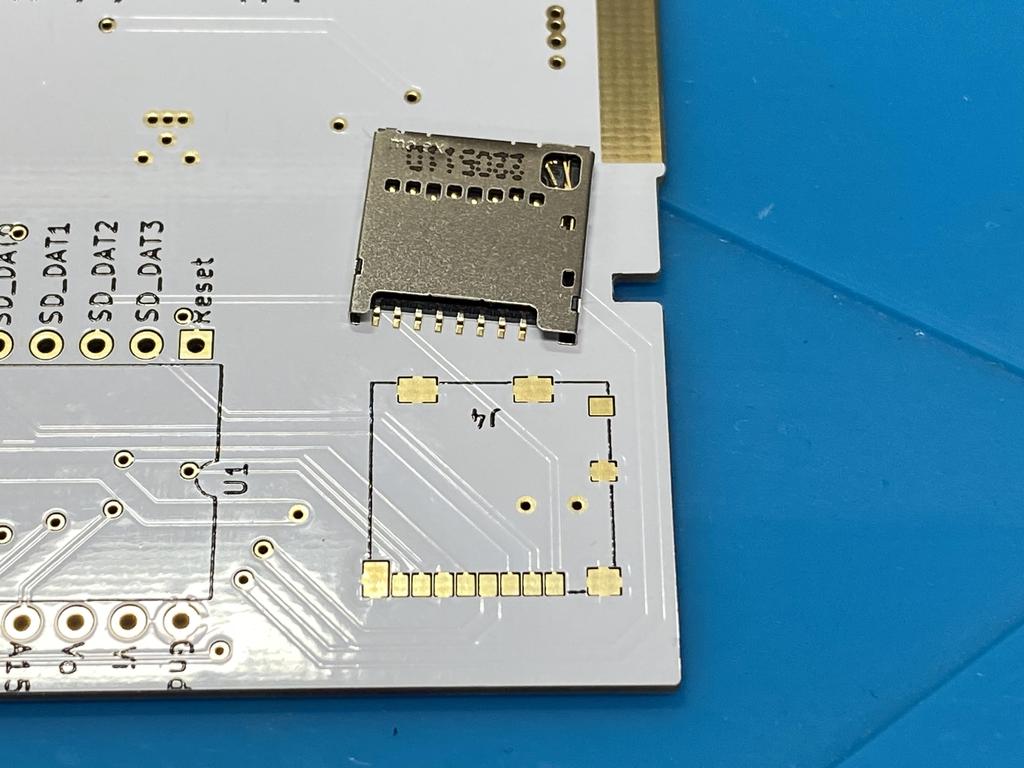
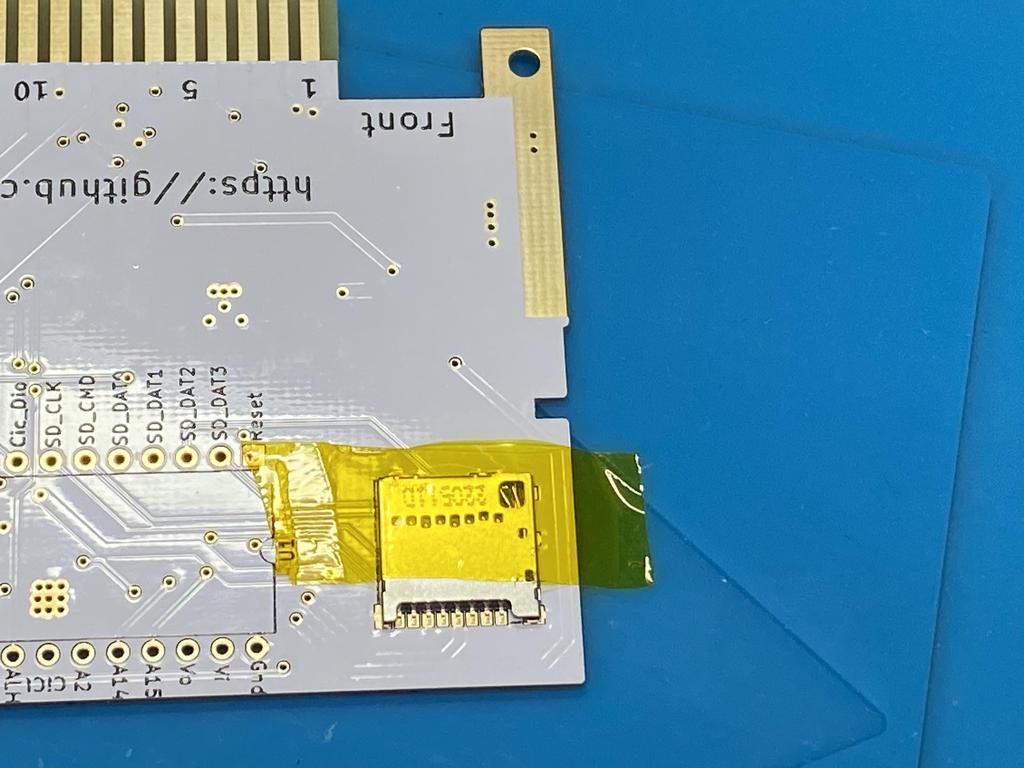
Once I aligned the pins, I used some Kapton tape to hold it in place:
Using flux, I then proceeded to solder the pins and anchor points to the pads on the PCB:
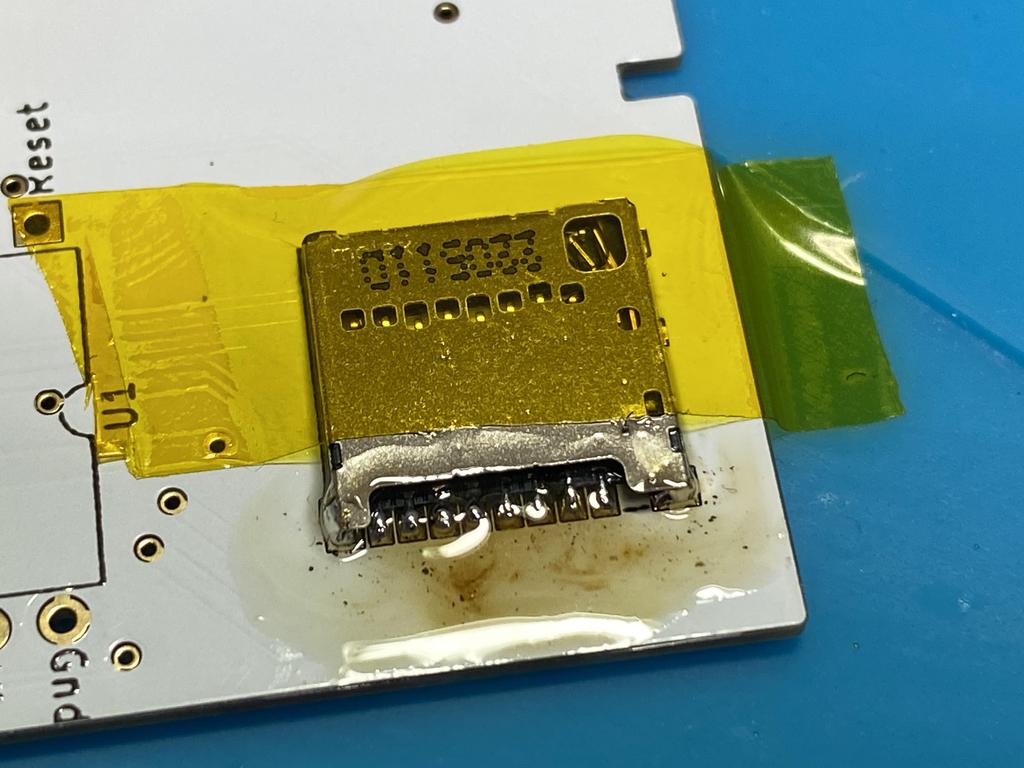
Initially, I didn’t realize that I had applied too much solder to the anchor point on the right side of the pins:
With this much solder there, I could not insert an SD card. I wicked away this blob, and touched up the outside of the anchor point with much less solder:
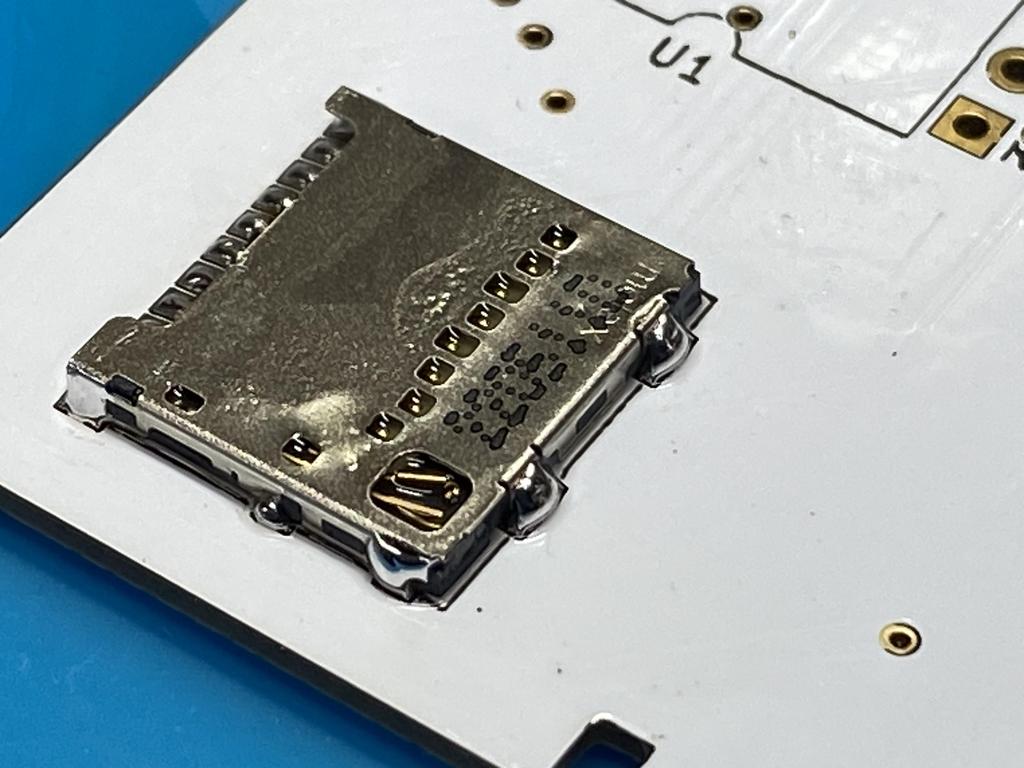
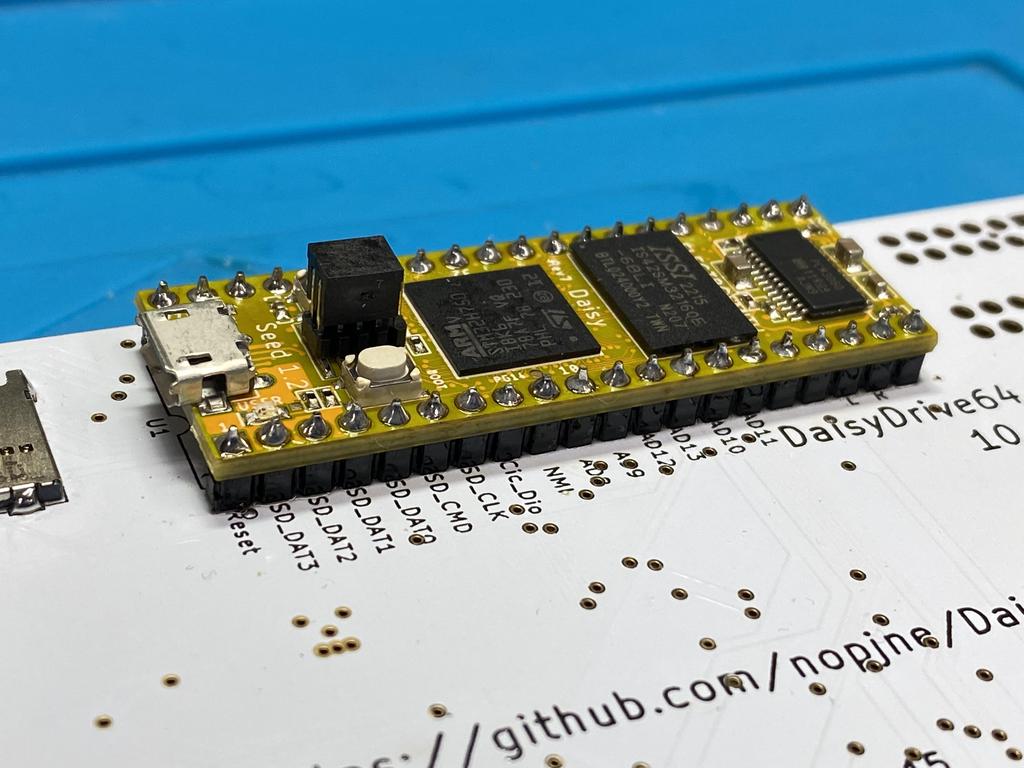
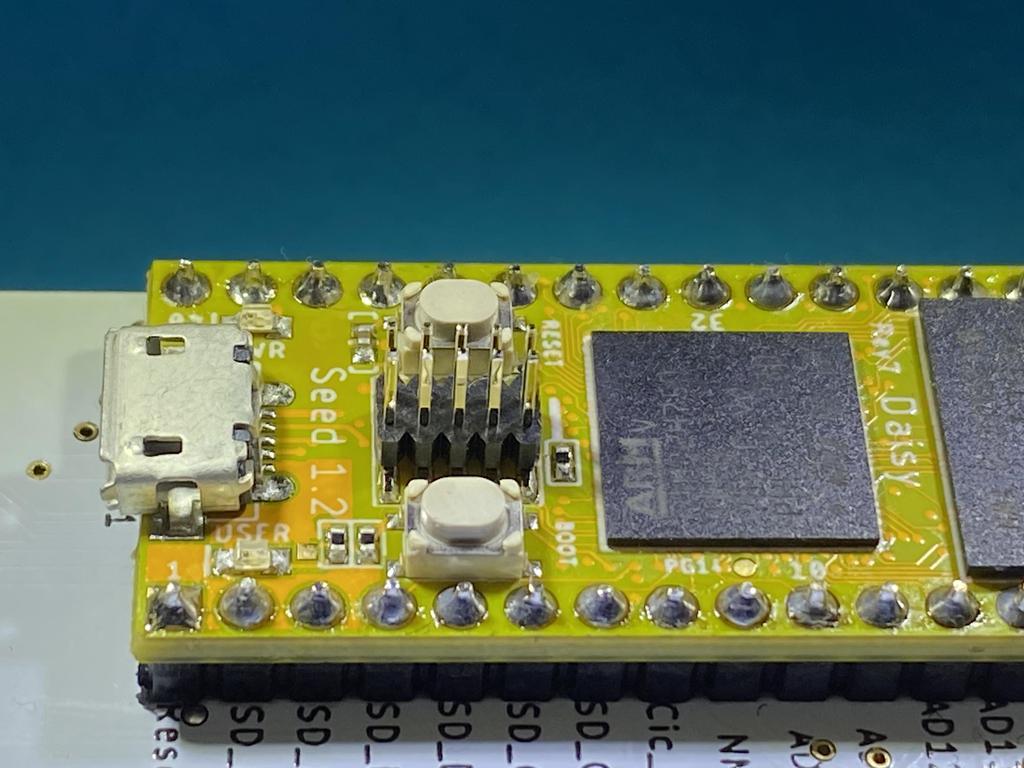
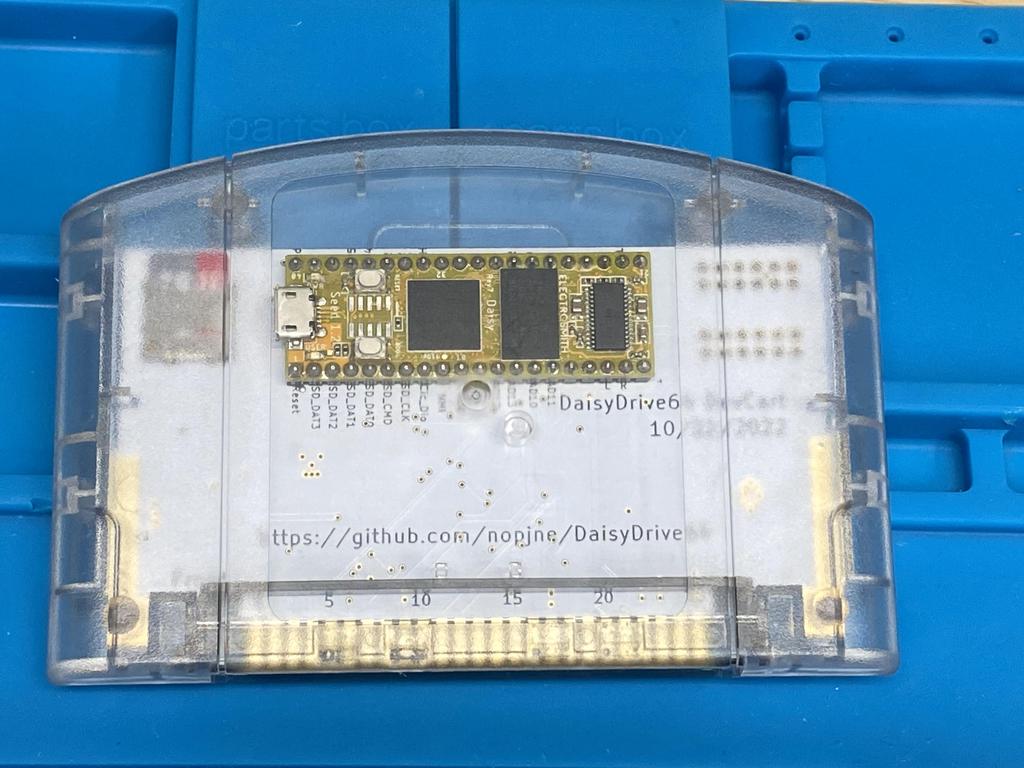
Next up was soldering the Daisy Seed board to the PCB. First, I inserted the headers into the board and soldered them to the underside of the PCB:
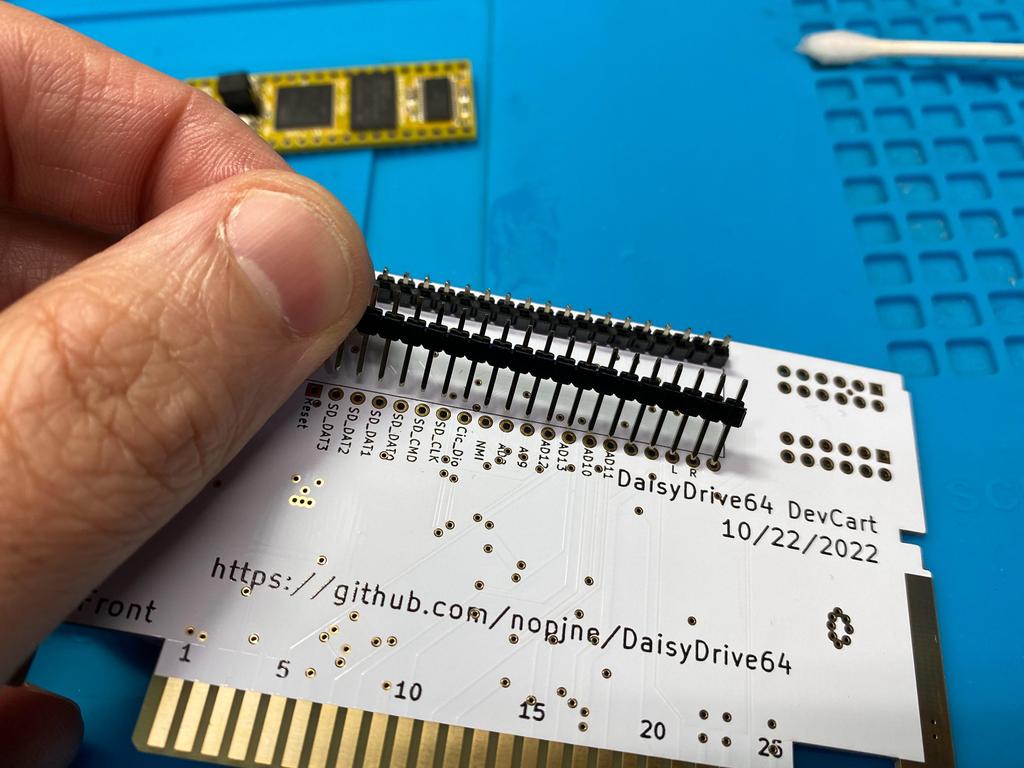
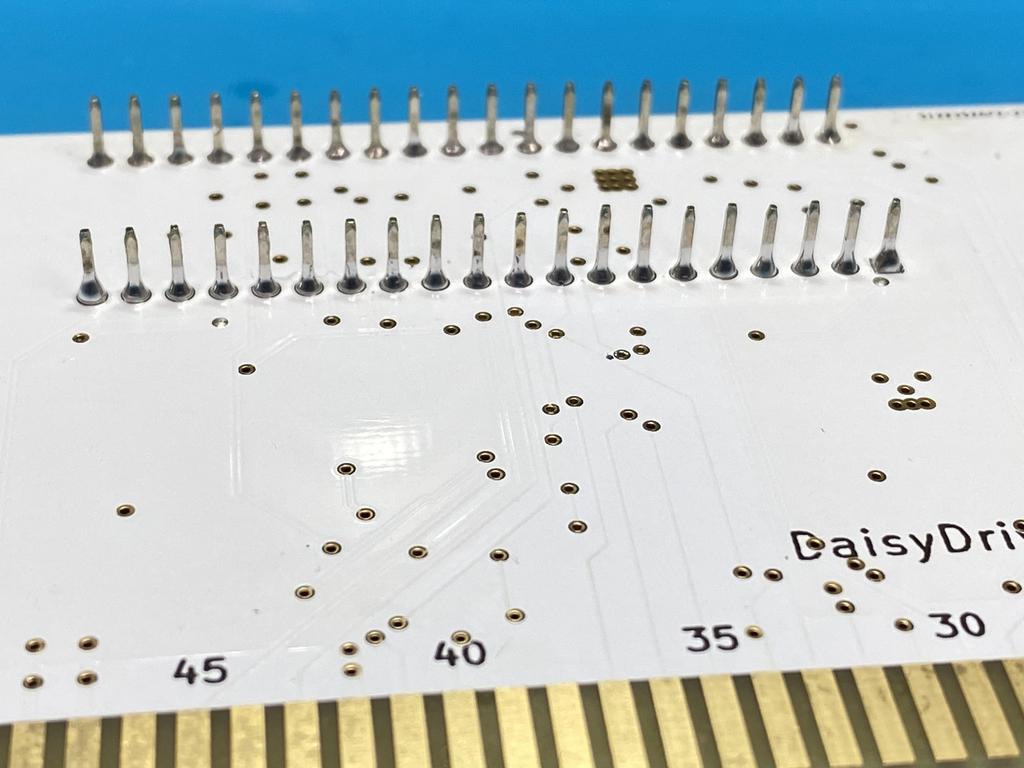
Then I placed the Daisy Seed board onto the header pins and soldered them in place:
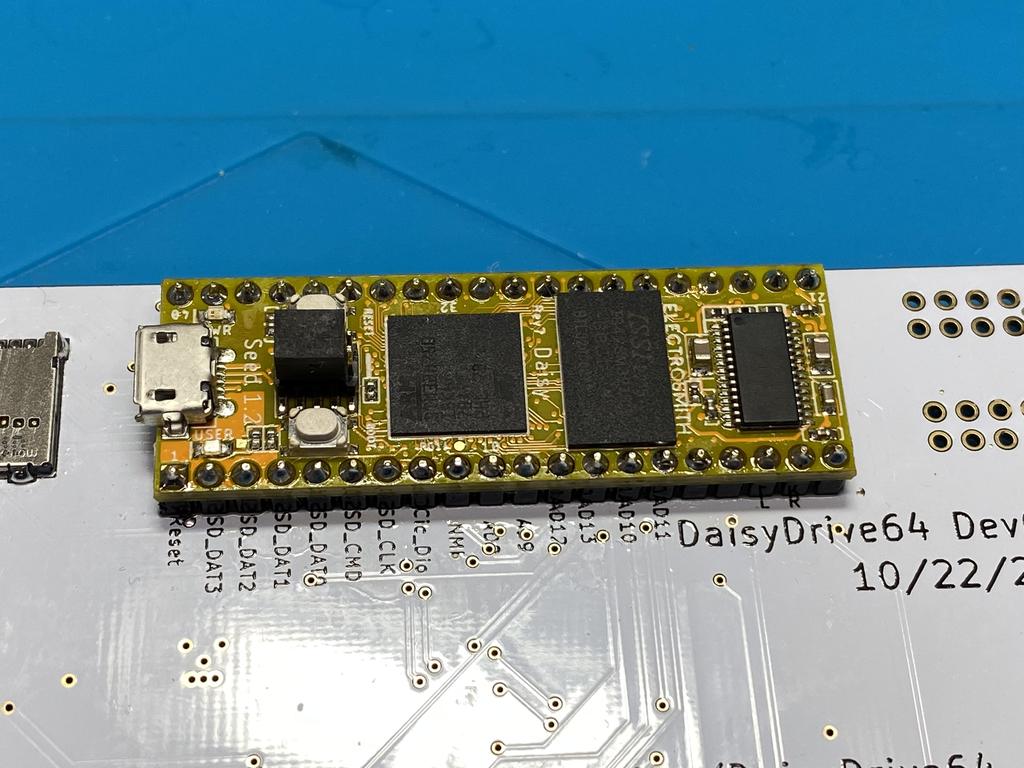
The last step is to bridge the Q1 connection underneath the PCB with a bit of wire:

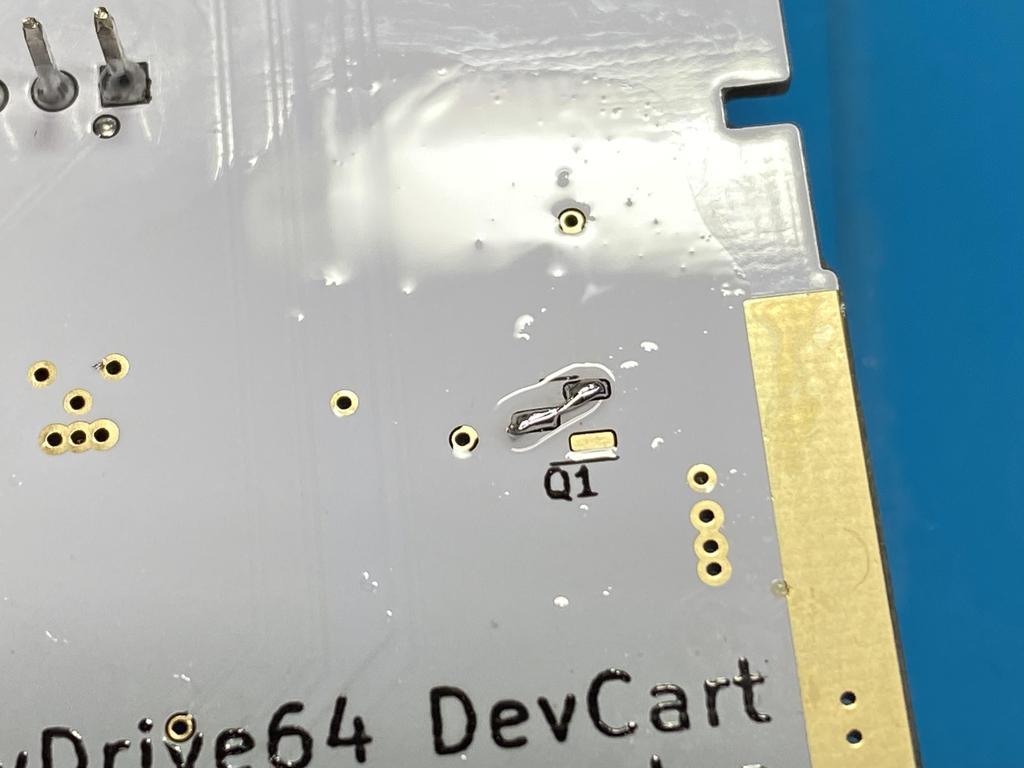
This connection was originally designed for a mosfet to protect against the N64 sinking current from the Seed’s USB connection; however, it isn’t necessary as the Seed has its own circuitry to prevent this issue, so we simply bridge the connection as shown above. Note that sinking current through the GPIO pins is still an issue when the firmware is halted, and therefore it’s recommended to take the cart out when flashing firmware through the USB port.
And with that, the PCB soldering is done.
Flashing the Daisy Seed’s firmware #
With the hardware bit all done, it was time to flash the Daisy Seed with the firmware that Scorp0rX0r developed. Ideally, we’d follow the build steps on the GitHub page to build the very latest firmware and related software, or download the latest build from the releases page. However, the version on the GitHub repo lags behind the version Scorp0rX0r makes available on Discord.
At the time of this writing, the latest GitHub release is a build from Jan 5 2023. On Discord, Scorp0rX0r has made a more recent Nov 11 2023 build available, which, among other things, adds full support for FlashRam and SRAM savestates. I downloaded this file, DaisyDrive64_111423.zip, and extracted the two files in there:
- DaisyDrive64_data.bin
- DaisyDrive64_fw.bin
To flash these files, I connected the Daisy Seed to my PC using a micro-USB to USB-A cable with data pins connected. Note that some USB cables are only used for charging, and are missing the data pins. When data pins are connected in the cable, Windows will play the “device connected” chime, and display the device in the Device Manager.
When I connected the Seed to my Windows machine, the board was recognized right away. However, when I put the Seed into DFU mode by holding the Boot button, then pressing and releasing the Reset button, the device now showed up as unrecognized in Device Manager:

This meant that I needed to install the driver for it. To do this, I downloaded Zadig, and with the Seed in DFU mode, I selected “DFU in FS Mode” from the pull-down (this is the same name as seen in the Device Manager), and pressed “Install Driver”:
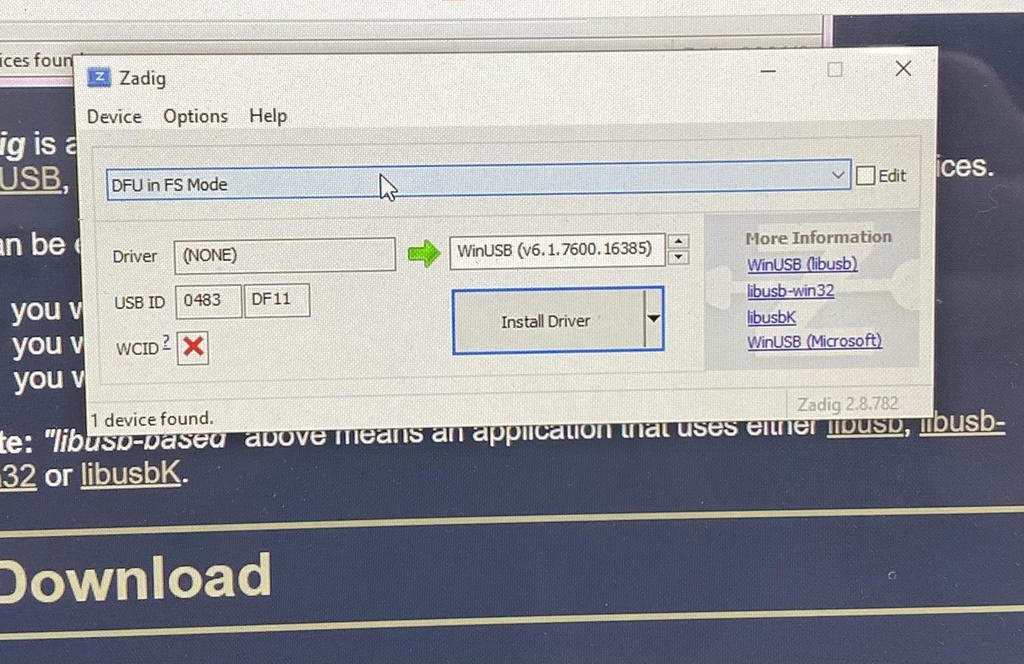
Once installed, Device Manager no longer showed the yellow exclamation icon.
With the drivers properly installed, it was time to flash the two files I downloaded earlier using the browser-based Programmer. Here are the steps to do so:
- Put the Seed into DFU mode by holding the Boot button, and pressing and releasing the Reset button.
- From the Programmer, click “Connect” and select “DFU in FS Mode”.
- Scroll down, click on “Advanced…”, which should reveal a “Flash Bootloader Image” button. Click on it. This will go through a few steps, and then eventually print “Done!”.
- Get the Seed out of DFU mode by disconnecting the USB cable, and reconnecting it.
- From the Programmer, click “Connect” and select “Daisy boot loader”.
- Click on “Choose File” and select the file “DaisyDrive64_data.bin”.
- Click on “Program”.
- Put the Daisy back into DFU mode again, “Connect” to it, click “Choose File” and this time, select the file “DaisyDrive64_fw.bin”.
With that, the Daisy Seed was now fully flashed and ready to go.
Preparing the SD card #
With the Seed’s firmware flashed, I now needed to setup the SD card with the right files and folders:
- OS64P.z64 –> This is a modified version of the Altra64 menu rom. This goes at the root of the SD card. As with the firmware, the latest version is not available on GitHub, but can be downloaded from Discord from the June 17 2023 build. Only copy the “OS64P.z64” from this zip file.
- DD64EC/ –> Create a folder named “DD64EC” at the root of the SD card.
- DD64EC/CFG/ –> And within the “DD64EC” folder, create another folder named “CFG”.
The last step, of course, is to copy some N64 roms to the SD card. These can be placed anywhere, such as in the root, or into folders. I copied some roms into a folder named “roms”. Note that the rom files must not be zipped.
Testing #
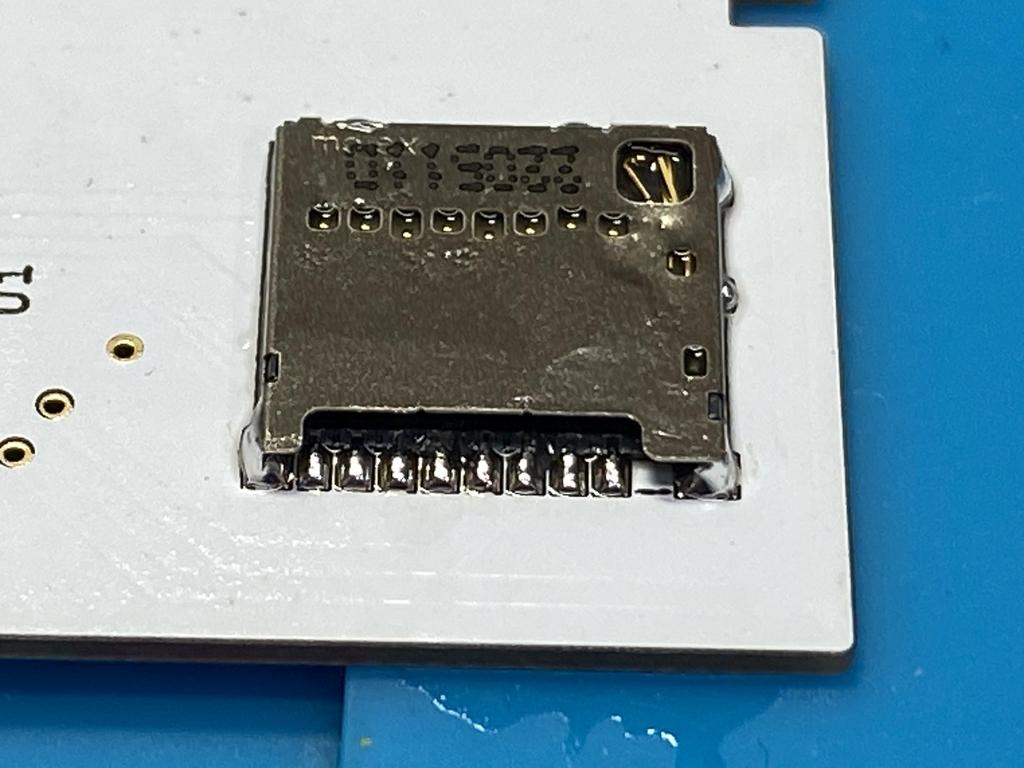
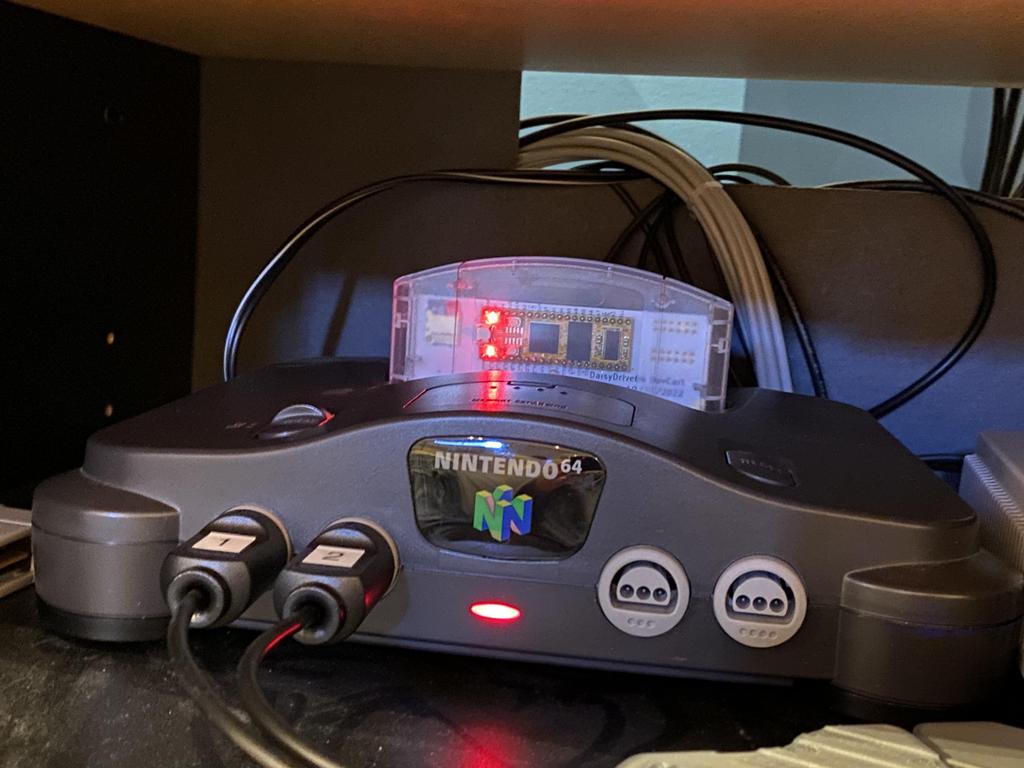
At this point, I could finally test everything. I inserted the SD card into the slot, and carefully inserted the PCB into my N64:
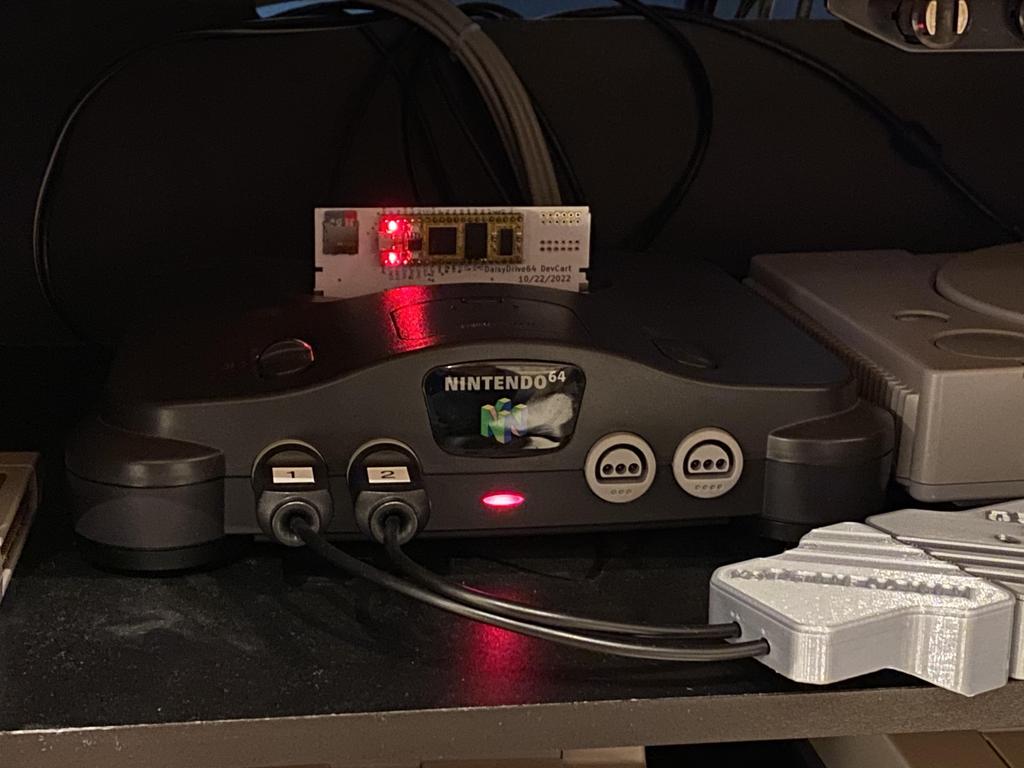
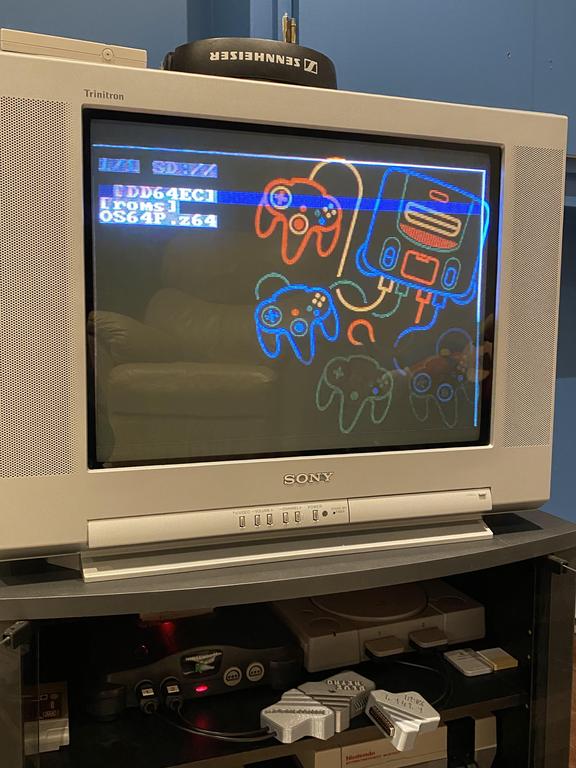
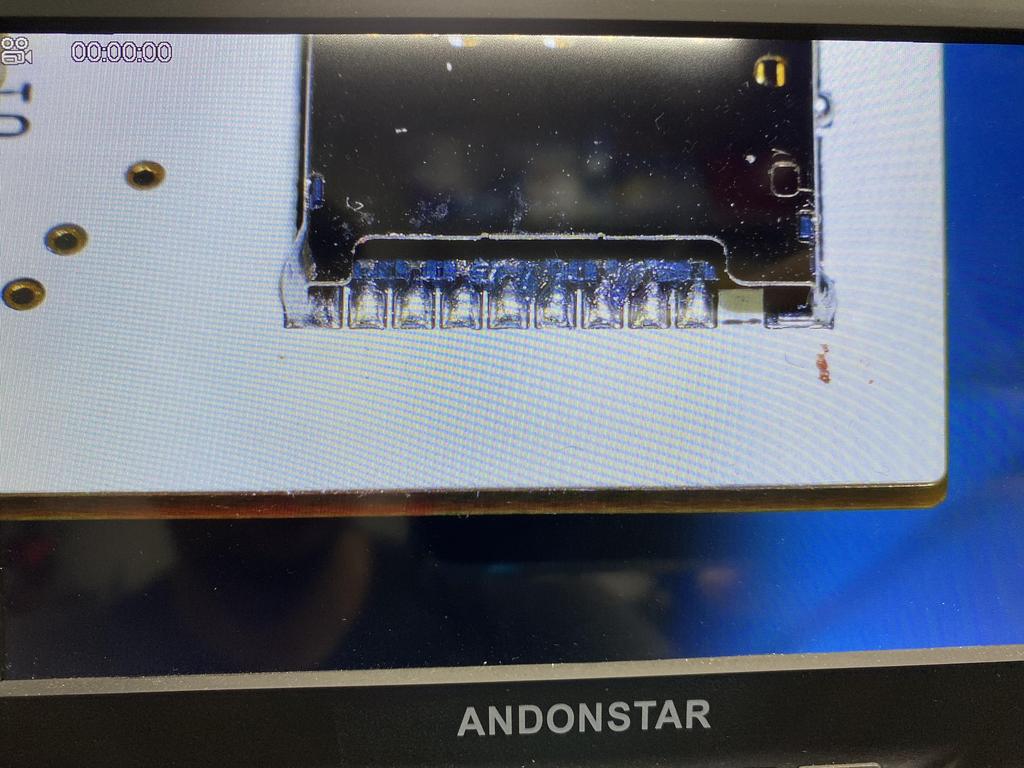
Success! Actually, it was not an immediate success. Initially, my SD card was not being read properly, and I experienced one of the coolest features of the DaisyDrive64: when it detects an error, it plays an error message through the audio output of the N64! In my case, “SD card initialization failed” came out of my TV speakers over and over. After reflowing the solder joints on the SD card connector, the message was gone, and everything worked.
Cart Shell #
With the PCB all working, the last thing I did was place it into an N64 cartridge shell. Unfortunately, this didn’t go as smoothly as I would have liked, but it still turned out alright.
First, I opened up the shell and got rid of the metal RF shielding, which can’t be used because the PCB with the Daisy Seed soldered onto it doesn’t fit otherwise:
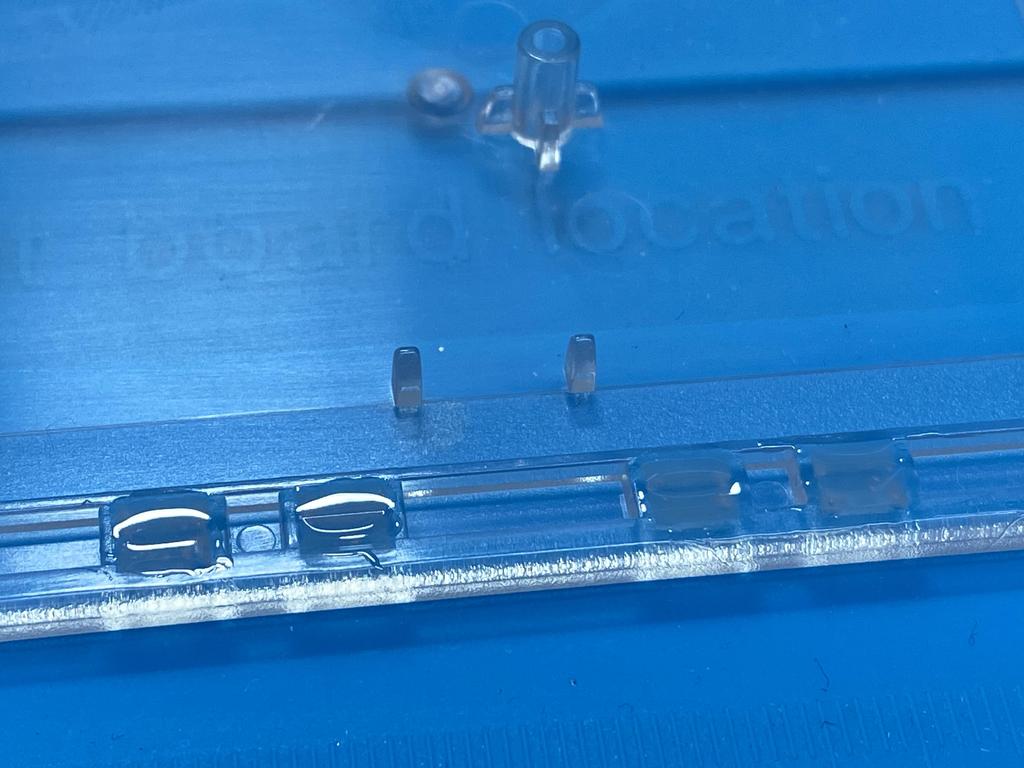
Unfortunately, getting rid of the shield is not that simple because apart from RF shielding, it also serves another purpose: there are 4 slots at the base of each side of the shell that the shield fills in:
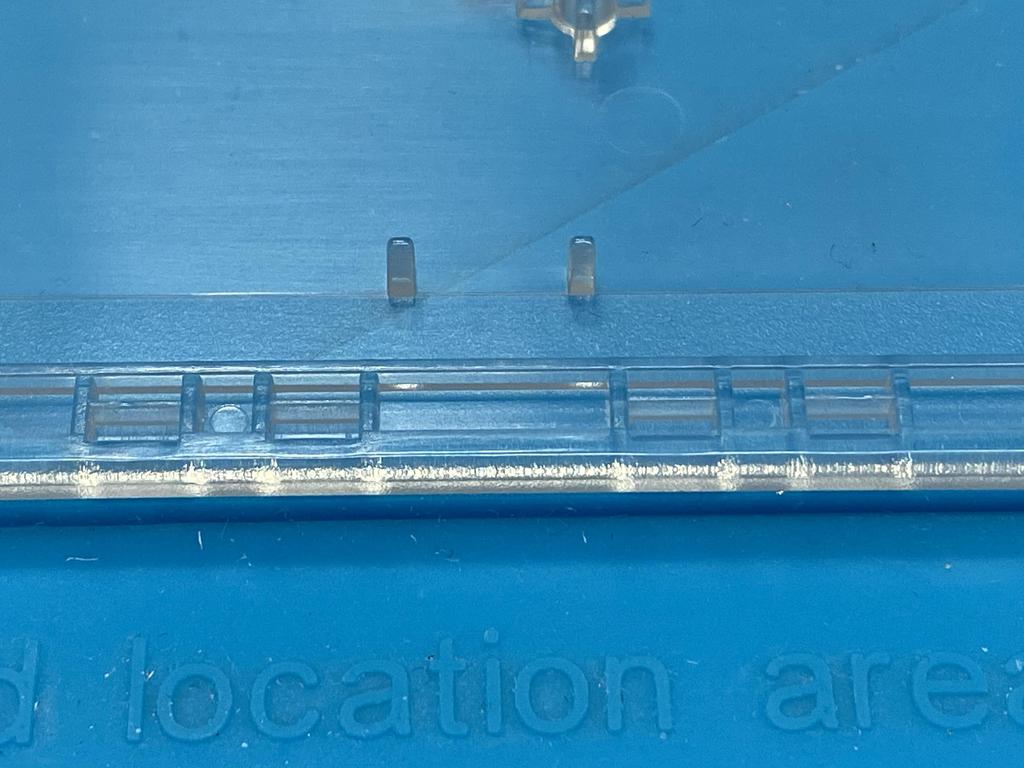
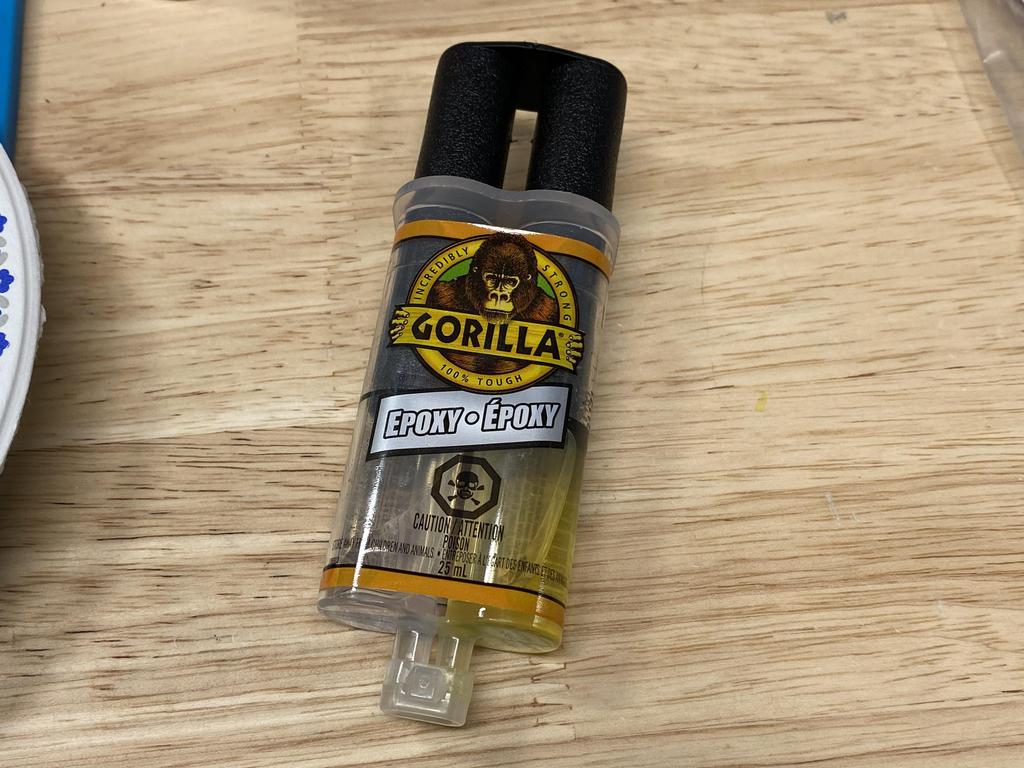
These slots need to be filled in, otherwise we risk breaking the N64’s cart slot. To do this, I filled in the 4 slots on each side of the shell with epoxy:
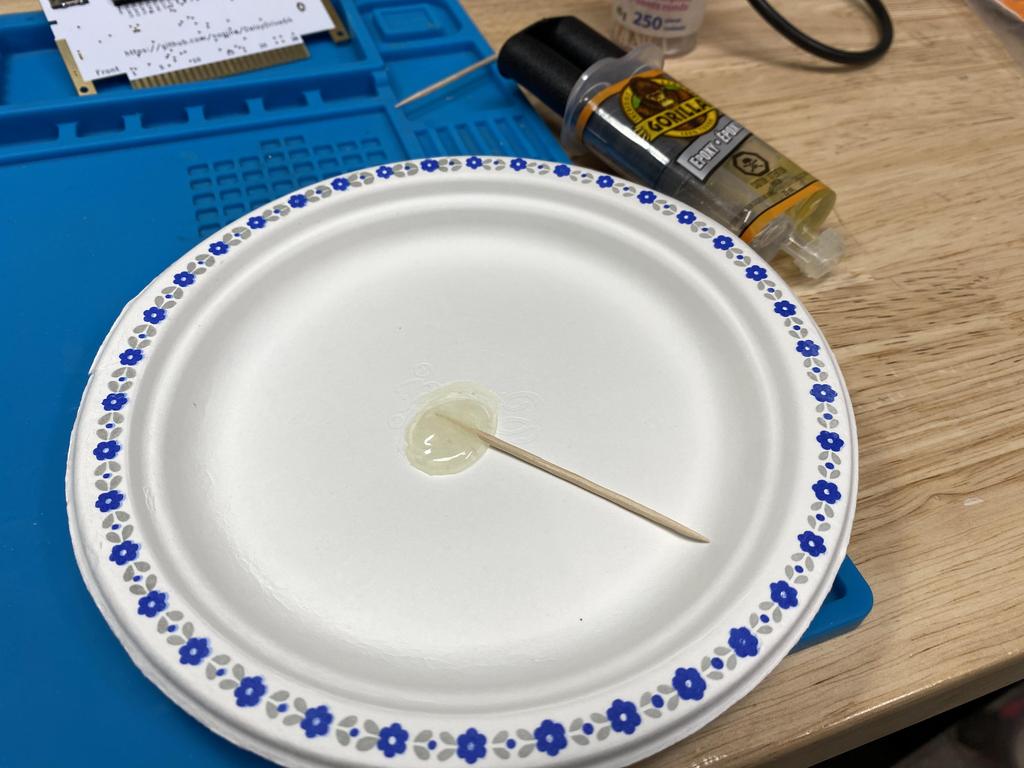
I let it cure for 24 hours:
Although it was fully cured, my epoxy remained a little soft and tacky. This isn’t great, but it seems to work fine. When I discussed this with Scorp0rX0r, he said he used a UV-light curing epoxy that, once cured, was hard as plastic. I would definitely recommend going this route instead.
Finally, even with the RF shield removed, the PCB still doesn’t quite fit in the shell because of the debug header pins on top of the Seed:
The simplest solution is to cut them off with flush cutters, or to bend them to the sides. I opted to use my heat gun to remove them, being careful to cover up the buttons with Kapton tape so that they wouldn’t melt, and being careful not to accidentally remove the small pull-up resistor right next to the header:

After cleaning up the solder with some wick:
It’s worth mentioning that Scorp0rX0r has a work-in-progress design where the Seed is soldered flush to the PCB, which adds the necessary clearance for the debug header, and would avoid the need to remove or modify it as I did above. This PCB is not yet available, but it would certainly help make the install a easier.
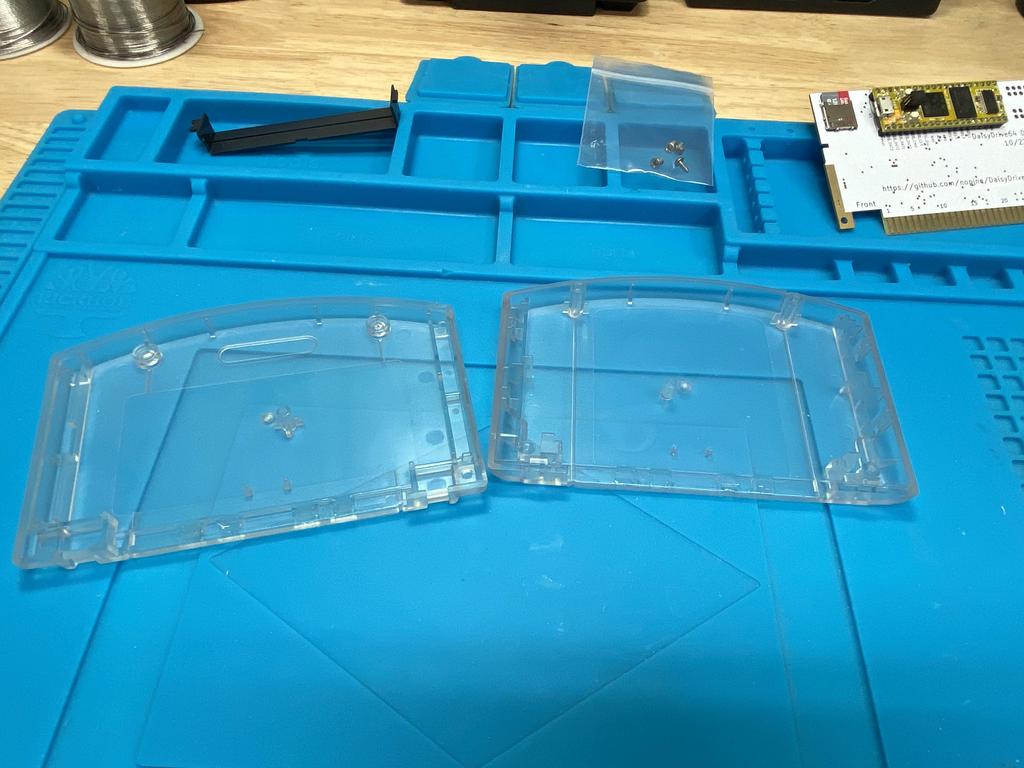
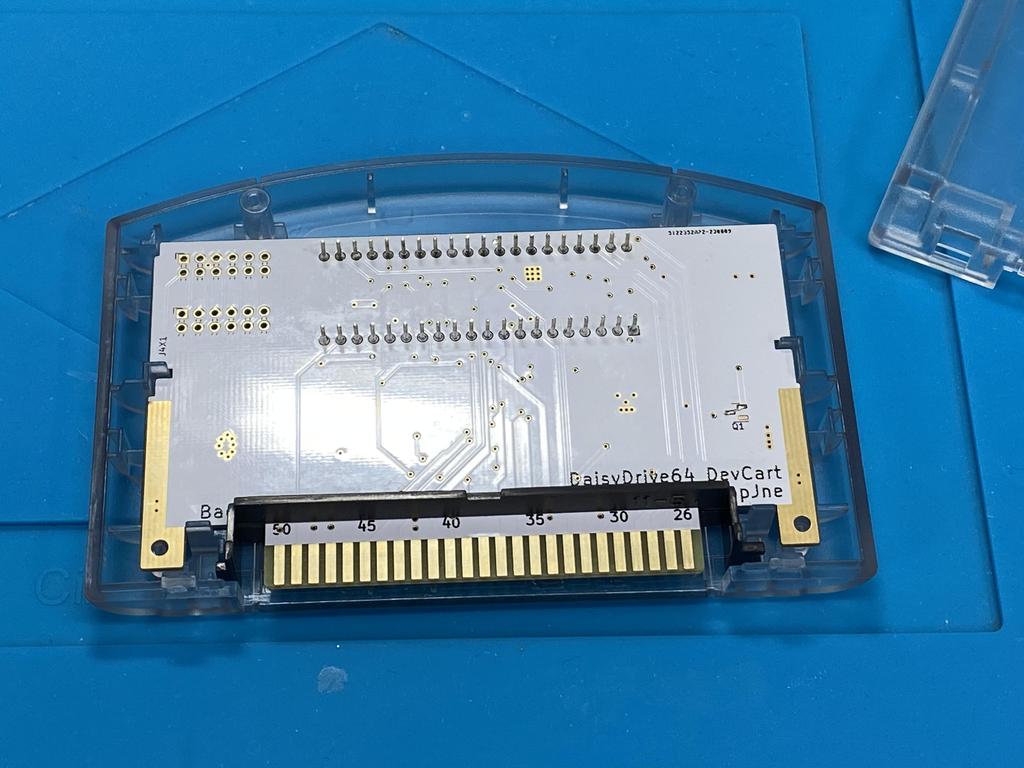
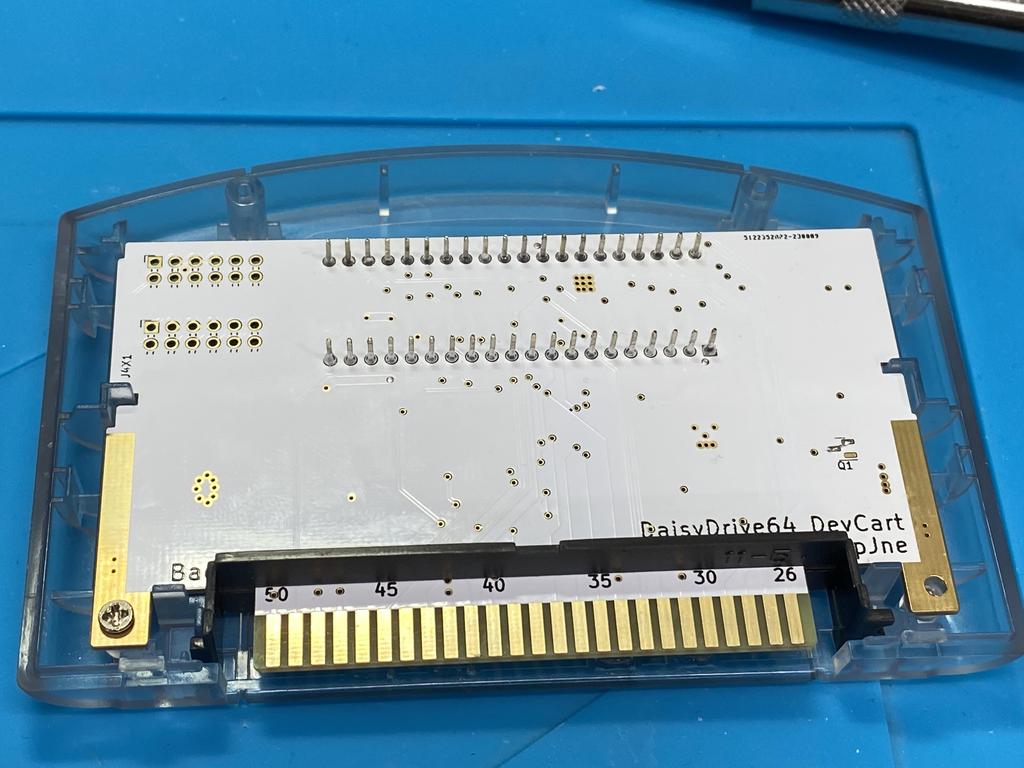
Finally, I was able to put it all together in the shell:
This is when I found out that the screws AliExpress sent me were too large for the screw posts:
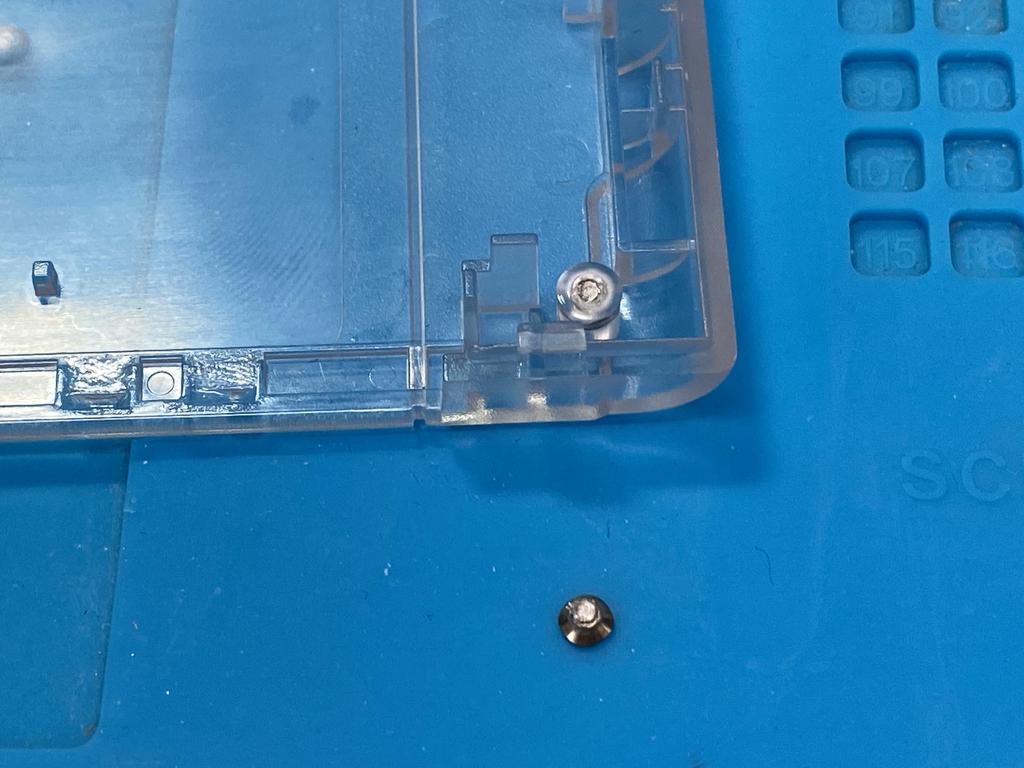
There wasn’t much I could do about that one, but for the second one, I used my drill to make the hole larger, and managed to screw in at least one side of the PCB (on the left):
The screws for the outside of the case also didn’t fit, so I ended up using some wood screws I had lying around:
Despite the issues with the screws, I think it looks pretty good:
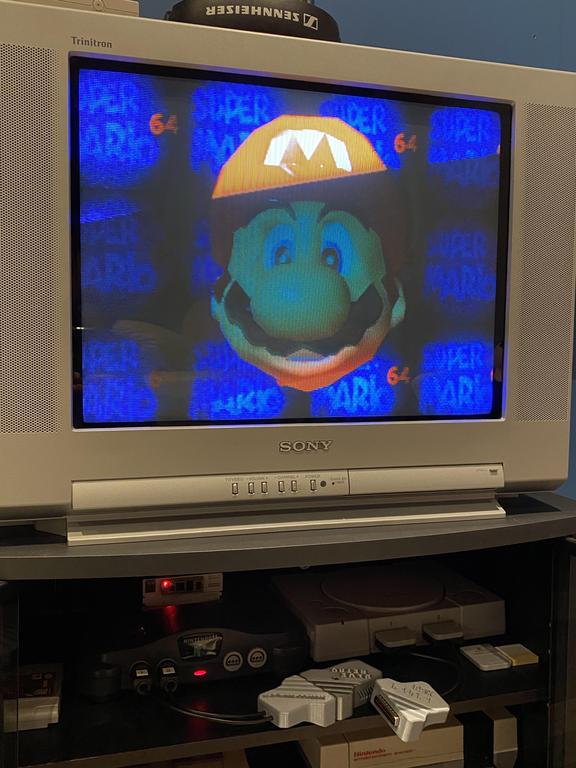
And here it is looking great in the N64:
Thoughts #
This is a really awesome project. I’ve been playing a bunch of N64 games over the past couple of weeks, and the DaisyDrive64 has been working really well. For a project that cost me around $70 USD (including shipping and the SD card), I’d say it’s well worth it for a fully functioning flash cart.
It’s worth noting that the DaisyDrive64 can also be used for N64 game development, and actually supports advanced debugging features if wired up correctly. For those interested in this, I would recommend hitting up the Discord server. It’s a nice community, and Scorp0rX0r is always ready to help.